Align Tools
Tools to help you align objects in your viewport.
Available for OSX and Windows for R20 to R25.
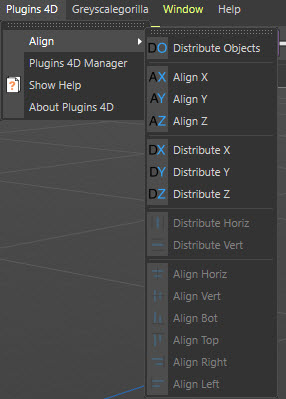
Menu Palette
The menu can be found at Plugins4D->Align.
Detach this menu and dock it somewhere in your layout for convenient access.
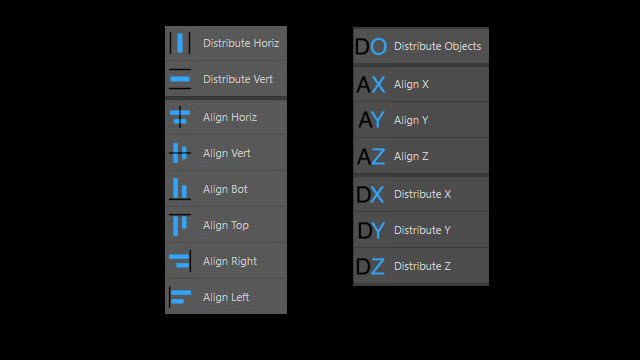
Alignment Tools
- First select objects in your scene that you wish to align with another object.
- Now select the object in your scene that you wish to align the selected objects to. You can do this by holding down CTRL to select the last object.
-
CTRL+Click in the Camera view that you wish to do the alignment. Holding down CTRL just ensures you don't loose your selection if you are changing which viewport you are working with.
- Top
- Bottom
- Left
- Right
- Front
- Back
- Select one of the Align tools from the menu.
- The initially selected objects will be aligned to the bounding box of the last selected object.
- If you hold down CTRL then the objects will be aligned to the axis of the last selected object instead.
Align XYZ Tools
- Switch to a perspective camera view.
- First select objects in your scene that you wish to align with another object.
- Now select the object in your scene that you wish to align the selected objects to. You can do this by holding down CTRL to select the last object.
- Select one of the Align tools from the menu.
- The initially selected objects will be aligned to the center of the bounding boxes of the last selected object.
- If you hold down CTRL then the objects will be aligned to the axis of the last selected object instead.
Distribution Tools
- Select objects in your scene that you wish to distibute.
-
Control click in the Camera view that you wish to do the alignment.
- Top
- Bottom
- Left
- Right
- Front
- Back
- Select one of the Distribution tools from the menu.
- Distribute Horiz: The selected objects will be distributed equally between the left most object and the right most object, in the chosen view, putting an equal amount of space between each of the objects bounding boxes.
- Distribute Vert: The selected objects will be distributed equally between the top most object and the bottom most object, in the chosen view, putting an equal amount of space between each of the objects bounding boxes.
Distribute XYZ Tools (World Space)
- Switch to a perspective camera view.
- Select objects in your scene that you wish to distibute.
- Select one of the Distribution X/Y/Z tools from the menu.
- The objects will be distributed in world space along the chosen axis.
Distribute XYZ Tools (Local Space)
- Switch to a perspective camera view.
- Select objects in your scene that you wish to distibute.
- Place them under a Null object
- Orient the Null object anywhere in your scene
- Select all the children of the Null object.
- While holding down the CTRL key, press one of the Distribution X/Y/Z tools from the menu.
- The objects will be distributed in local space along the chosen axis of the parent object.
Distribute Object
- Add a Distribute Object to your scene.
- Select objects in your scene that you wish to distibute and place them under the Distribute Object.
- On the Distribute Object, select the axis you wish to distrbute the children along.
- Move the two end most child objects along the chosen axis to redistribute the object giving the equal space between their bounding boxes
- When resizing any of the objects it will also redistribute them accordingly.